“`html
Crafting a DIY Wooden Headboard: A Step-by-Step Guide
In recent years, home improvement enthusiasts have increasingly turned to do-it-yourself projects. Many find a sense of accomplishment from creating or customizing their own furniture, and a DIY Wooden Headboard is a popular venture. According to a survey from the Home Improvement Research Institute, over 60% of DIYers tackled furniture projects last year, and headboards often top the list of bedroom upgrades.
Why Make a DIY Wooden Headboard?
Creating a DIY Wooden Headboard allows them to express personal style, tailor it to their room dimensions, and often save money compared to buying premade options. Furthermore, it gives them a chance to learn new skills and acquire tools that will serve them in countless future projects.
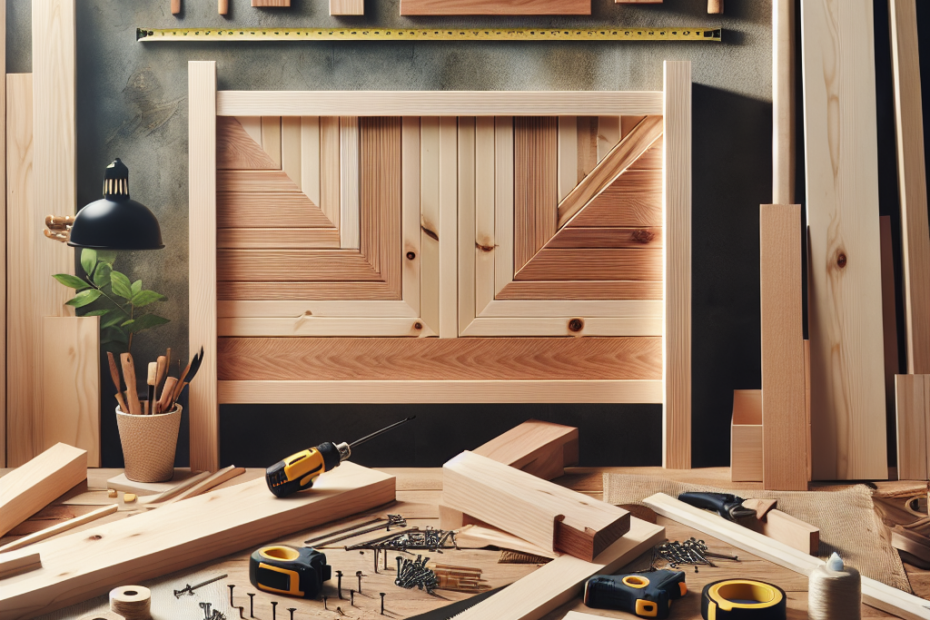
Materials and Tools Needed
| Materials | Tools |
|---|---|
| Wooden planks | Saw |
| Wood stain or paint | Drill |
| Screws | Measuring tape |
| Sandpaper | Paintbrush |
| Wood glue | Safety goggles |
Before starting, gather all necessary materials and tools. They should select wooden planks based on preference, whether they wish to achieve a rustic or modern look. Don’t forget safety goggles and a dust mask when cutting or sanding wood.
Step-by-Step Instructions
Step 1: Measure and Plan
First, measure the width of their bed to determine the appropriate size for their headboard. It’s essential to create a blueprint of their design, including the plank arrangement and dimensions. Proper planning will ensure stability and aesthetics.
Step 2: Cut the Wood
Using their saw, cut the wooden planks to the desired sizes. For a standard queen bed, a width of 60 inches with a height of 48 inches is recommended to create a stunning visual impact. Ensure each piece is smooth, using sandpaper to eliminate rough edges.
Step 3: Assemble the Frame
Create a simple frame by connecting the cut wooden planks using screws. Evenly space each plank to maintain balance. Wood glue can also be used to reinforce the structure, enhancing durability.
Step 4: Sand and Finish
After assembling the frame, thoroughly sand the surface to remove any remaining rough patches. Apply a wood stain or paint according to personal preference. They might opt for a natural wood stain to highlight the grain or a bold color to make a statement.
Step 5: Install the Headboard
Allow the stain or paint to fully dry before installation. Secure their DIY Wooden Headboard to the bed frame or the wall behind the bed using appropriate fixtures. Check the stability regularly, ensuring that the headboard is securely fastened.
Benefits of a DIY Wooden Headboard
Besides being cost-effective, making a DIY Wooden Headboard adds a personal touch to their bedroom decor. Crafting their own furniture often allows for customization that factory-made options don’t provide, enabling them to experiment and evolve their style. According to Furniture Today, custom-designed pieces tend to offer a higher satisfaction rate, aligning with personal taste and practical needs.
Key Takeaways
- DIY Wooden Headboards provide a personalized, budget-friendly solution for enhancing bedroom aesthetics.
- An appropriate selection of materials and tools is crucial for a successful project.
- Following a methodical, step-by-step approach ensures stability and style.
- Homemade furniture pieces often bring higher satisfaction than store-bought options.
Frequently Asked Questions (FAQ)
Q1: What type of wood is best for a DIY wooden headboard?
A: Pine and plywood are excellent choices due to their affordability and ease of use. However, oak or cherry wood provides a more luxurious feel if the budget allows.
Q2: Can they make a headboard if they’re not experienced in woodworking?
A: Yes, with detailed instructions and basic tools, even beginners can successfully complete this project. Start with simpler designs to build confidence.
Q3: How long does it take to make a DIY wooden headboard?
A: Typically, it can take around a weekend from start to finish, allowing time for measuring, cutting, assembling, and drying.
Q4: Could they repaint their wooden headboard in the future?
A: Absolutely! Sand down the existing finish and apply a fresh coat of paint or stain to update their headboard’s look.
Q5: Is it expensive to build a DIY wooden headboard?
A: While costs can vary, most find it more budget-friendly than purchasing a store-bought equivalent. Prices depend on wood type and additional finishes.
“`
This guide provides a comprehensive, user-friendly approach to creating a DIY Wooden Headboard, appealing to both seasoned DIYers and newcomers. It’s a satisfying project that ultimately enriches any bedroom space.